Your Consultative Signs and Graphics Partner for Eastside Businesses


Retail Banking Branch Interior Graphics in Redmond: A Buying Guide
Oct 16, 2026 by Signarama Redmond
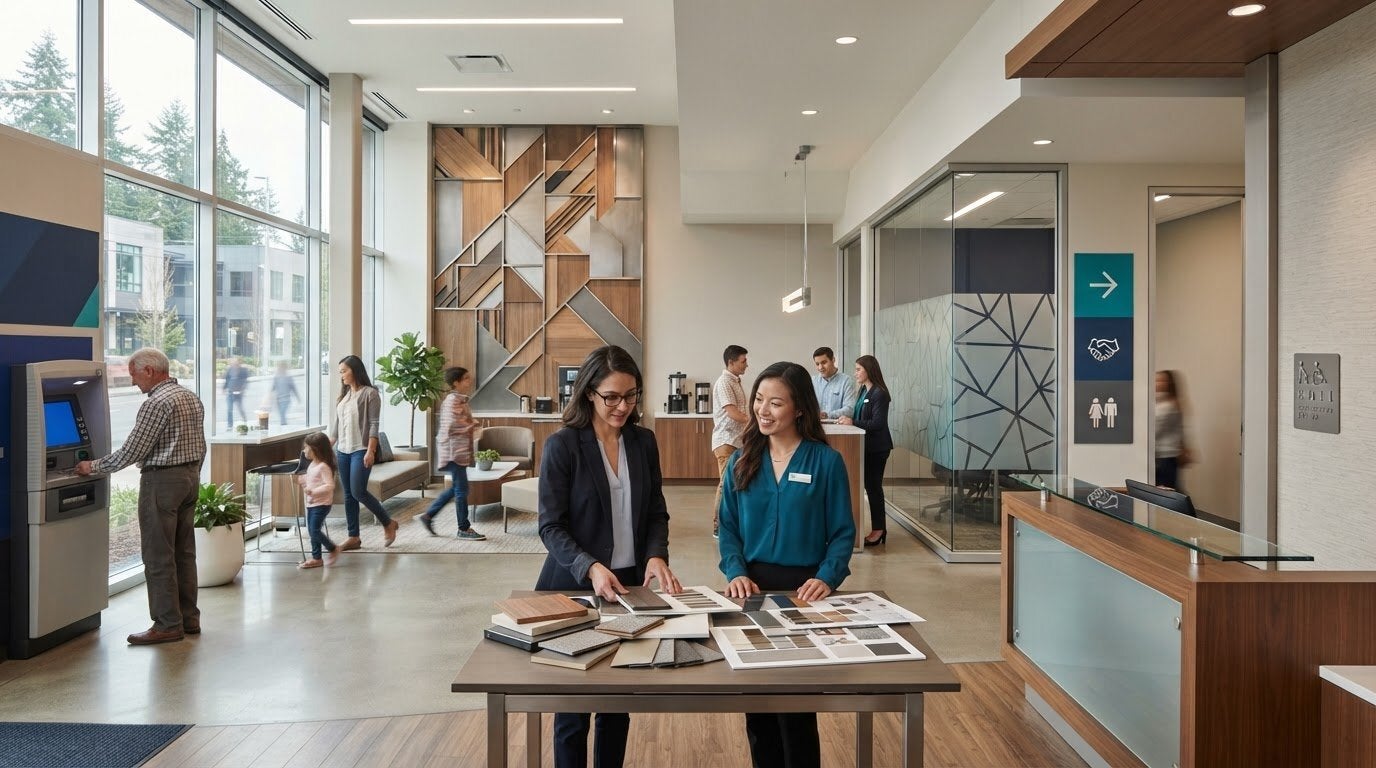
The most useful bank branch graphics may not be the ones customers notice first. They’re the ones that help people feel welcome and find their way. Planning retail banking branch interior graphics Redmond banks can use starts with customer touchpoints, from the entrance and reception area to service spaces and private offices.
A visual refresh needs to do more than display a logo. It should reflect the bank’s brand, suit the branch layout, and make the experience feel clear and professional, all within a defined project scope. Choosing graphics for each area can help balance those goals.
This guide covers options such as lobby and reception signs, logo walls, dimensional letters, wall and window graphics, wayfinding, and ADA-compliant signs. You’ll also learn how to prepare a practical brief around your brand, space, budget, and permitting needs, then coordinate design, permitting, fabrication, and installation with a local partner. The result is a clearer path from early planning to a cohesive branch interior.
Key Takeaways
Match graphics to customer touchpoints so branding, information, and navigation each have a clear purpose.
Compare reception signs, logo walls, dimensional letters, wall graphics, wayfinding, and ADA-compliant signs by where they’ll be used.
Use brand fit, legibility, placement, durability, and project scope to guide your graphics choices.
Plan retail banking branch interior graphics Redmond projects around the branch layout, budget, and permitting needs.
Coordinate design, permitting, fabrication, and installation through a clear project plan with a local signs and graphics partner.
Table of Contents
Why Retail Banking Branch Interior Graphics Matter in Redmond
Interior Graphics Options for a Redmond Retail Banking Branch
Why Retail Banking Branch Interior Graphics Matter in Redmond
Start with the space, not the sign. Which parts of your Redmond branch need to express the bank’s identity, share information, or help visitors find their way? The entrance, reception desk, consultation rooms, and service areas each meet customers at a different point in their visit. Mapping those touchpoints first helps you choose graphics for a clear purpose instead of adding visual elements without a plan.
Retail banking brings customers into a branch for services and in-person interactions, as outlined in Retail Banking. Interior graphics can help connect that setting to the bank’s brand. Branch interior graphics are visual signs and graphics, such as logo walls, dimensional letters, and wall graphics, that help identify and organize customer-facing spaces. They can contribute to a professional, welcoming environment, but they can’t guarantee customer satisfaction, sales, or other business outcomes.
This guide focuses on signs and graphics, not a complete branch redesign involving furniture, layout, or other interior elements. A bank might refresh selected brand touchpoints in its existing space, add graphics to a new interior, or coordinate signs as part of a broader project. Defining that boundary keeps the scope clear and ties graphics decisions to the customer experience.
Which branch touchpoints should the graphics support?
Follow the customer’s path through the branch. At the entrance, visitors may need information that helps them identify where to go. At reception, a reception sign can identify the service point, while a logo wall can create a visible brand anchor. These elements communicate identity; they shouldn’t be treated as guaranteed sales drivers.
Further inside, wayfinding signs can direct visitors toward consultation rooms or service areas and help them orient themselves. Consider what someone needs to understand at each point, then place information where it can guide the next step without competing with other signs.
What should a Redmond bank decide before choosing graphics?
Set the project context before selecting graphics. Clarify who uses the branch, which aspects of its identity should come through, and which customer-facing spaces are in scope. A branch serving a particular community may need a different emphasis from another location in the same network, while both should still feel consistent with the bank’s brand.
Project type: Is this a graphics refresh, a new interior, or a focused update to a few areas?
Priority spaces: Which locations need branding, information, or directional guidance?
Brand intent: What should customers recognize as they enter and move through the branch?
These decisions also help distinguish graphics needs from the wider interior sign requirements of a workplace. For related context, explore professional office signs in Redmond. A well-defined brief gives the graphics project a practical starting point.
Interior Graphics Options for a Redmond Retail Banking Branch
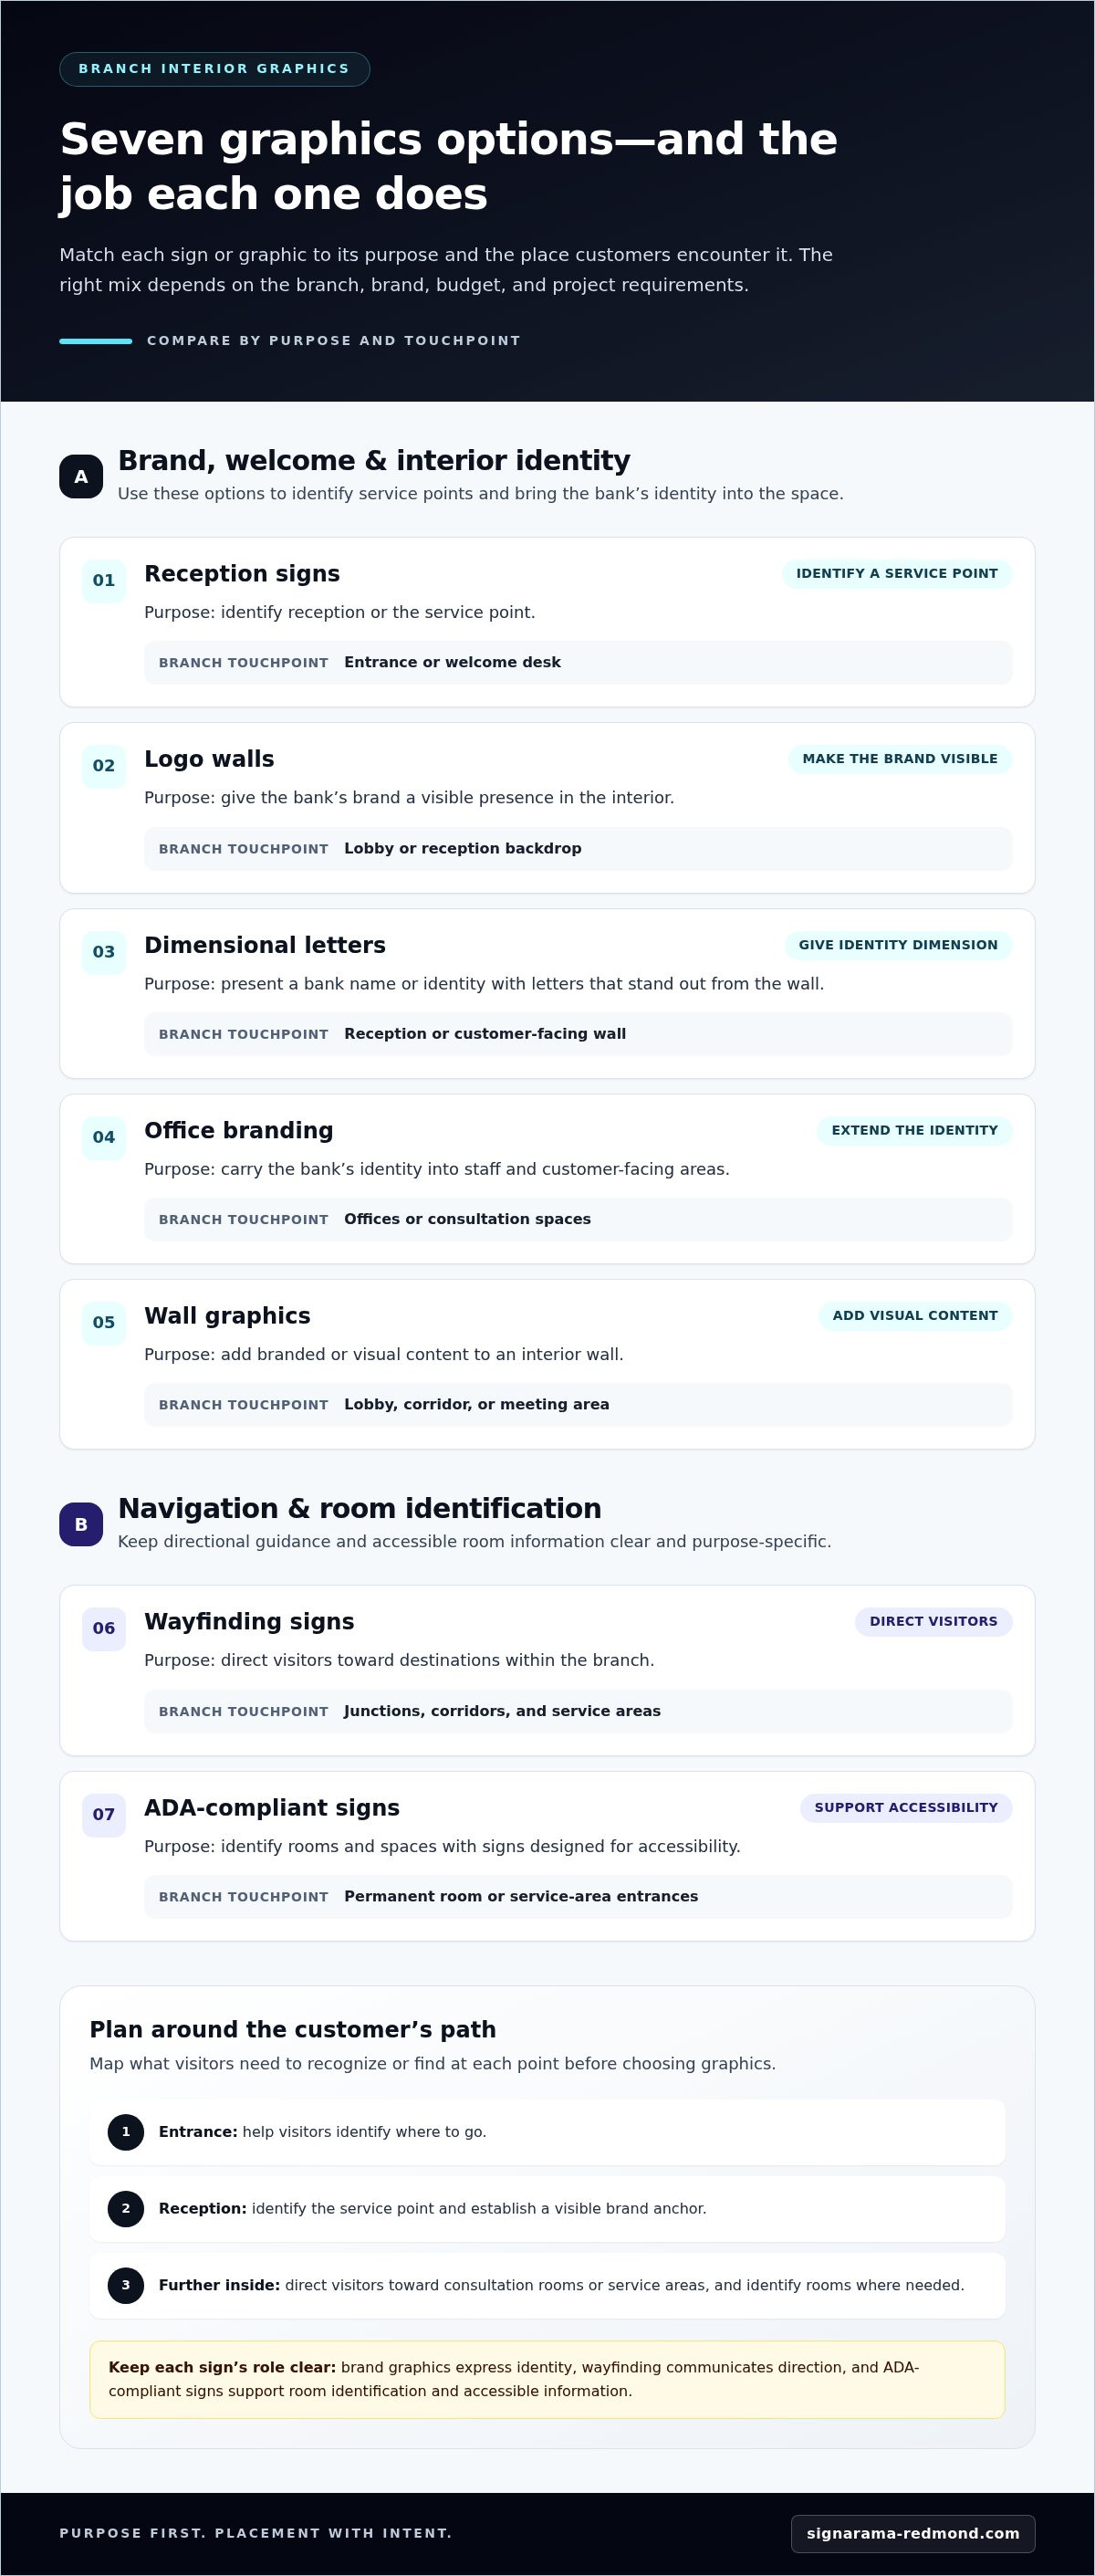
There’s no single graphics package that suits every branch. The right mix depends on the space, brand, budget, and project requirements, including which areas customers use and what each sign needs to communicate. Use the comparison below to connect each graphics category to a practical purpose before deciding what belongs in your project scope.
Graphics category | Purpose | Typical branch touchpoint |
|---|---|---|
Reception signs | Identify the reception or service point | Entrance or welcome desk |
Logo walls | Give the brand a visible presence in the interior | Lobby or reception backdrop |
Dimensional letters | Present a bank name or identity with letters that stand out from the wall | Reception or customer-facing wall |
Office branding | Carry the bank’s identity into staff and customer-facing areas | Offices or consultation spaces |
Wall graphics | Add branded or visual content to an interior wall | Lobby, corridor, or meeting area |
Wayfinding signs | Direct visitors toward destinations within the branch | Junctions, corridors, and service areas |
ADA-compliant signs | Identify rooms and spaces with signs designed for accessibility | Permanent room or service-area entrances |
Brand graphics for reception and customer-facing areas
Reception signs and logo walls bring the bank’s identity into the branch interior and help connect the welcome area to the wider brand. Dimensional letters project from a surface, presenting a name or logo as a distinct wall element. Office branding extends that identity into selected workspaces without requiring graphics on every wall.
Wall graphics can add branded imagery or messages to a lobby, corridor, or consultation area. If the branch’s windows are part of the visual plan, custom window decals offer related context for considering graphics on glass.
Wayfinding and ADA signs for branch navigation
Brand-focused graphics express identity, wayfinding communicates direction, and ADA-compliant signs support room identification and accessible information. These roles can complement one another, but one sign type shouldn’t be expected to do every job. For example, a logo wall can establish a branded reception area, while separate directional signs guide visitors toward a consultation room. ADA-compliant signs are an option for branches planning room identification.
Branding helps a branch feel like the bank, wayfinding points visitors toward destinations, and ADA-compliant signs support accessible identification. Clear roles help prevent visual clutter and make it easier to prioritize graphics that fit the project.
For retail banking branch interior graphics Redmond projects, Signarama Redmond can help shape the scope around the branch’s space, identity, and project needs. To discuss a graphics plan, explore branch graphics planning.
How to Compare Banking Branch Graphics Before You Buy
Compare each option against the job it needs to do, not just how it looks in a mockup. For retail banking branch interior graphics Redmond projects, a practical review covers brand fit, intended touchpoint, legibility, placement, durability, and project scope. These criteria help decision-makers compare a focused refresh with a broader set of interior signs without assuming every branch needs the same solution.
Match the graphics to the branch’s purpose and audience
Start with a simple question for each proposed graphic: what customer or staff need will it support? A logo wall can identify the bank’s brand in a reception area. A room sign identifies a destination, while a wayfinding sign gives visitors direction. Keeping those purposes distinct prevents a brand element from being asked to carry information it wasn’t designed to convey.
Then consider who uses the space and how the branch layout shapes their path. A sign may be visible from the entrance but harder to notice near a corridor turn. The final mix should reflect both the bank’s identity and the locations where people need branding, information, or guidance.
Assess legibility, placement, durability, and scope
Review whether the intended message is easy to read in its proposed location and visually distinct from nearby graphics. Branding and navigation can compete if every surface carries a prominent message. A clear hierarchy helps: prioritize essential directions at decision points, then place brand-focused graphics where they support the environment without obscuring useful information.
Durability is another consideration, especially for signs in customer-facing areas that see regular use. A site survey can help inform dimensions, placement, and scope by grounding decisions in the actual branch space. Signarama Redmond coordinates design, permitting, fabrication, and installation as parts of the project.
A focused refresh may address a few high-priority areas, such as reception branding or a directional sign. A broader interior sign package may also include room identification and wayfinding across more of the branch. Neither approach is right for every location. Choose a scope that fits the branch’s needs and budget, and give each proposed item a defined role.
Bring this checklist to a project discussion:
Brand fit: Does the graphic reflect the bank’s identity?
Purpose: Should it identify the bank, name a room, or point the way?
Legibility and placement: Can the intended audience read it where it will be installed?
Durability and scope: Does the proposed sign suit its location, and is the project focused or branch-wide?
To put these decisions into a practical brief, Book a free 30-min on-site consultation. Signarama Redmond also offers a free site survey or quick quote.
Plan a Retail Banking Interior Graphics Project in Redmond
A clear plan connects branch goals to the right signs and graphics while accounting for the space, budget, permitting, and installation. Signarama Redmond starts with a conversation about those project needs, then designs, permits, fabricates, and installs code-compliant, durable signage. Use this sequence to prepare for a productive project discussion.
Define the goals. Decide what the graphics should accomplish in the branch. Separate brand expression from practical information, such as room identification or directions, and identify the customer-facing areas that matter most.
Review the site. Gather branch plans or photos and note the intended sign locations. A site survey can help assess dimensions, existing surfaces, customer circulation, and where signs need to be visible. It also gives the project team a clearer picture of the space before finalizing scope.
Scope the graphics. Create a priority list that distinguishes brand graphics, room signs, and wayfinding. Decide whether the work is a focused update to selected areas or a broader set of interior signs, then align the proposed scope with the branch’s budget parameters.
Address permitting. Include permitting in the project conversation from the start. The project team can consider permitting needs alongside the proposed signs, location, and scope, rather than treating it as an afterthought.
Plan installation. Coordinate installation around the selected sign locations and the branch’s project requirements. A defined scope makes it easier to align the final design, fabrication, and installation steps.
Prepare a useful branch graphics brief
Bring brand guidelines, branch plans or photos, intended sign locations, and a short summary of project goals. Identify priority spaces, then label each need as branding, room identification, or directional guidance. Clarify budget parameters and any project requirements that could shape the scope. This preparation gives the conversation a practical starting point without requiring every design decision to be settled in advance.
Coordinate permitting, fabrication, and installation
Permitting is part of the overall planning process, alongside design and fabrication. Signarama Redmond coordinates these stages through installation, keeping the project organized around the branch’s requirements. For added context on the final stage, explore professional sign installation in Redmond.
For a project tailored to your branch’s space, brand, budget, and permitting needs, Book a free 30-min on-site consultation. You can also request a free site survey or quick quote.
Work with Signarama Redmond on Branch Interior Graphics
Planning branch signs and graphics is easier when a project partner helps connect visual choices to the actual space. Signarama Redmond works with Eastside businesses on retail banking branch interior graphics Redmond projects, taking a consultative approach to the branch’s identity, customer-facing areas, and practical requirements.
Options include lobby and interior signs, wall graphics, wayfinding signs, and ADA-compliant signs. These can support different needs across a branch: expressing the bank’s identity, adding visual information to an interior, guiding visitors, or identifying rooms. The right mix depends on the project scope, not a one-size-fits-all package.
Signarama Redmond serves Redmond, Bellevue, Kirkland, Seattle, Bothell, Woodinville, Renton, and the Greater Seattle Metro area. For a bank with multiple regional locations, a local conversation can help clarify which needs are specific to one branch and which should align with a broader brand approach.
What to expect from the first project conversation
The discussion begins with the branch space, brand, budget, and permitting. Sharing the project’s goals and priority areas helps shape a useful starting scope, whether you’re planning a focused update or considering signage throughout the interior. You can discuss lobby and reception areas, wall graphics, wayfinding, and room identification together, considering each proposed sign in relation to its purpose and location.
A site survey can ground project decisions in the branch itself. Signarama Redmond offers a free 30-minute on-site consultation and a free site survey or quick quote, giving you a practical way to begin discussing the space and scope.
Start a Redmond branch graphics conversation
Before the conversation, gather the branch location, a short description of your goals, and the spaces you want to prioritize. Brand guidelines, photos, or plans can also make the discussion more specific. You don’t need to have every sign selected in advance. A clear picture of what the branch needs to communicate is a strong first step.
From there, Signarama Redmond coordinates design, permitting, fabrication, and installation for durable, code-compliant signage. This connected project path keeps the selected graphics tied to the branch’s requirements from initial planning through installation. The focus stays on signs and graphics that suit the space and support the intended experience.
Ready to discuss the branch’s needs and next steps? Book a free 30-min on-site consultation and ask about a free site survey or quick quote.
Turn Your Branch Graphics Plan into a Clear Next Step
A useful graphics plan gives your team a shared reference point: what each sign should communicate, where it belongs, and how it should fit the branch’s identity. That clarity can also help keep future updates consistent, even as the needs of individual customer-facing spaces differ. For retail banking branch interior graphics Redmond projects, start with the locations and messages that matter most, then shape the work around the branch instead of trying to solve every need at once.
You don’t need every detail finalized before beginning a project conversation. Bring your priorities and questions, and use the discussion to develop a practical direction for the space. A site survey or quick quote can help move that planning forward. Book a free 30-min on-site consultation and take the next step toward a branch graphics plan that feels considered, clear, and true to your bank’s identity.
Frequently Asked Questions
Can interior graphics refresh a bank branch without a full renovation?
Yes. A graphics-focused project can update selected areas without changing the branch’s wider interior. For example, a bank might replace an outdated reception sign or add a wall graphic while keeping its existing layout and furnishings. This can suit a branch that wants to refresh its visual identity or address a specific sign need. Scope retail banking branch interior graphics Redmond projects around the changes that matter most to the branch.
What should a bank include in a brief for branch interior graphics?
A useful brief explains the project goal, branch identity, priority spaces, and intended audience. Include available brand guidelines, photos or plans, and a list of existing signs that may need replacement or coordination. Note who will review the proposed graphics and any budget parameters or project constraints. These details help distinguish essential items from optional updates and give the project discussion a clear, practical starting point.
How do lobby signs and wayfinding signs serve different purposes in a bank?
Lobby signs identify or brand a space, while wayfinding signs direct people to destinations. For instance, a reception sign can identify the welcome desk, while a directional sign can point visitors toward a consultation area. Treating these as separate needs helps keep messages clear. A branded lobby feature shouldn’t have to provide every direction, and directional signs can stay focused on helping visitors understand where to go.
Are ADA-compliant signs the same as branded interior graphics?
No. Branded interior graphics express the bank’s identity, while ADA-compliant signs support accessible identification of spaces. A logo wall, for example, communicates brand presence; a room-identification sign serves a different purpose. A branch may plan for both, but each should be considered according to its intended use. Signarama Redmond offers ADA-compliant signs as well as lobby and interior signs and graphics.
Can a bank use wall graphics alongside reception signs and logo walls?
Yes. These graphics can be planned together when each has a defined role and the overall composition stays clear. A reception sign can identify the service point, a logo wall can feature the bank’s identity, and wall graphics can add visual content to another interior area. Consider sightlines and nearby messages so one element doesn’t distract from information customers need to notice.
What happens during a free on-site consultation for bank graphics in Redmond?
The conversation starts with the branch’s space, brand, budget, and permitting needs. Bring photos, plans, or a short list of priority areas to make the discussion concrete. Signarama Redmond also offers a free site survey or quick quote as part of getting a project underway. To begin, Book a free 30-min on-site consultation and request a free site survey or quick quote.
Does Signarama Redmond serve banks outside Redmond?
Yes. Signarama Redmond serves businesses in Bellevue, Kirkland, Seattle, Bothell, Woodinville, and Renton, as well as Redmond and the Greater Seattle Metro area. Banks in these communities can discuss branch signage and graphics needs with the team. For a project involving more than one location, share which branches are in scope and what each space needs to communicate so the conversation can address the locations together.

Signarama Redmond, WA
Summer Hours (July - August) - MON-THUR: 8.00AM - 6.30PM, FRI - SUN: CLOSED
contact
Signarama Redmond, WA