Your Consultative Signs and Graphics Partner for Eastside Businesses


How to Prevent Vinyl Wrap from Peeling: Causes, Application, and Care
Oct 8, 2026 by Signarama Redmond
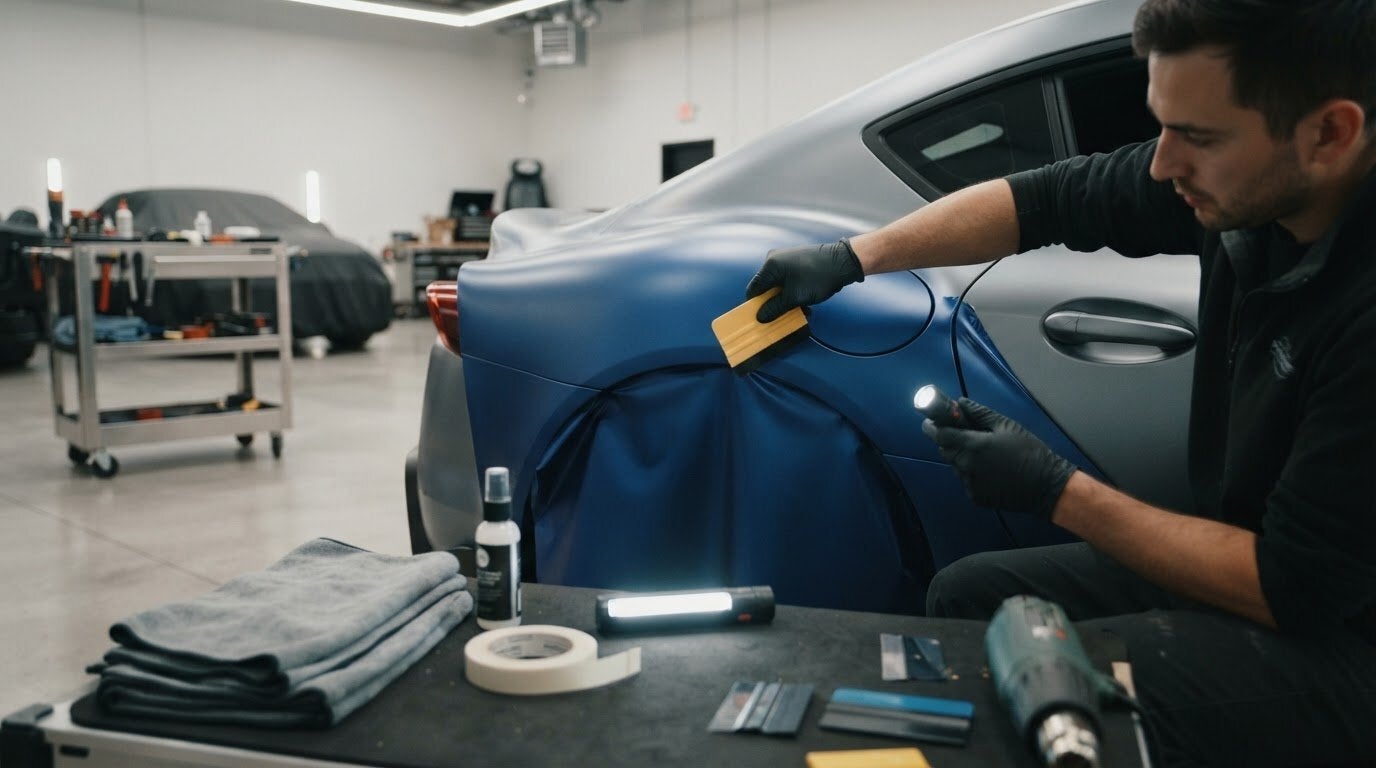
A vinyl wrap’s peeling edge can signal a problem that began before the film ever touched the vehicle. If you’re wondering how to prevent vinyl wrap from peeling, start with the main factors that affect adhesion: surface condition, installation technique, and everyday care. Even a small lift can spread and leave the vehicle looking unfinished, but practical steps before and after application can help reduce avoidable problems.
Preparation and aftercare matter as much as the film itself. This guide covers common causes of lifting and offers a checklist for before, during, and after installation. Learn why cleaning and decontaminating the surface matters, how stretching can put stress on edges, and what to consider when washing a newly wrapped vehicle, including waiting 48 to 72 hours before its first wash. You’ll also learn what to document if peeling appears and why a quick DIY fix may not solve the underlying problem.
Key Takeaways
Learn how to prevent vinyl wrap from peeling by addressing surface condition, careful application, and ongoing care.
Inspect the vehicle surface before wrapping, and treat damaged or poorly bonded paint as a concern that needs assessment.
Pay close attention to curves, recesses, seams, and panel edges, where film handling and finishing can affect adhesion.
Use gentle cleaning methods and follow the film maker’s current care instructions.
If an edge starts lifting, photograph the area and limit handling while you assess the film, location, and extent of the damage.
Table of Contents
How to Prevent Vinyl Wrap from Peeling: Start with the Causes
Preventing edge lift before it starts is different from addressing a wrap that’s already peeling. Before application, choose film suited to the project, prepare a clean and sound surface, and follow the film maker’s application and care instructions. If lifting appears, document the damage and consider what may have contributed to it. That distinction is a useful starting point for anyone learning how to prevent vinyl wrap from peeling.
Vinyl-wrap peeling is the loss of adhesion that causes film to lift from an edge or surface. The material’s behavior is shaped by its composition and use; the properties of polyvinyl chloride offer background on PVC, a material used in vinyl films. On a vehicle, look for warning signs such as:
Edges that lift, curl, or no longer sit flat.
Bubbles or wrinkles that weren’t there before.
Spots where dirt repeatedly collects along an edge or seam.
Changes around curves, recesses, or panel joins.
These signs show where to look, but they don’t identify the cause by themselves. When the change appeared, where it is, the surface condition, and the vehicle’s exposure all provide useful context.
What makes vehicle-wrap edges lift?
Contamination on the vehicle, including moisture, wax, grease, or cleaning residue, can interfere with adhesion. Film also faces extra demands where the body curves sharply, dips into a recess, crosses a seam, or ends at a panel edge. Stretching the film too much or aligning it poorly in these areas can put it under stress. Later, impact, abrasion, and prolonged environmental exposure may contribute to damage or lifting.
Is peeling always caused by poor installation?
No. Installation is one possible factor, not a diagnosis. Lifting noticed soon after application may point to preparation, placement, or edge finishing. Damage that appears later may follow repeated abrasion, an impact, or exposure. These are clues, not proof. The same visible symptom can have different causes, so don’t assign fault based on appearance alone.
How should you assess an early warning sign?
Before cleaning or handling the area, record its location and appearance. Take clear photos both close up and from farther away. Note when you first noticed the change and whether it has spread. A small lift at a panel edge differs from bubbles across a broad section, but don’t pull or press either area as a quick fix. Clear documentation helps focus an assessment on the film, location, and visible condition.
Prepare the Vehicle Surface Before Applying Vinyl Wrap
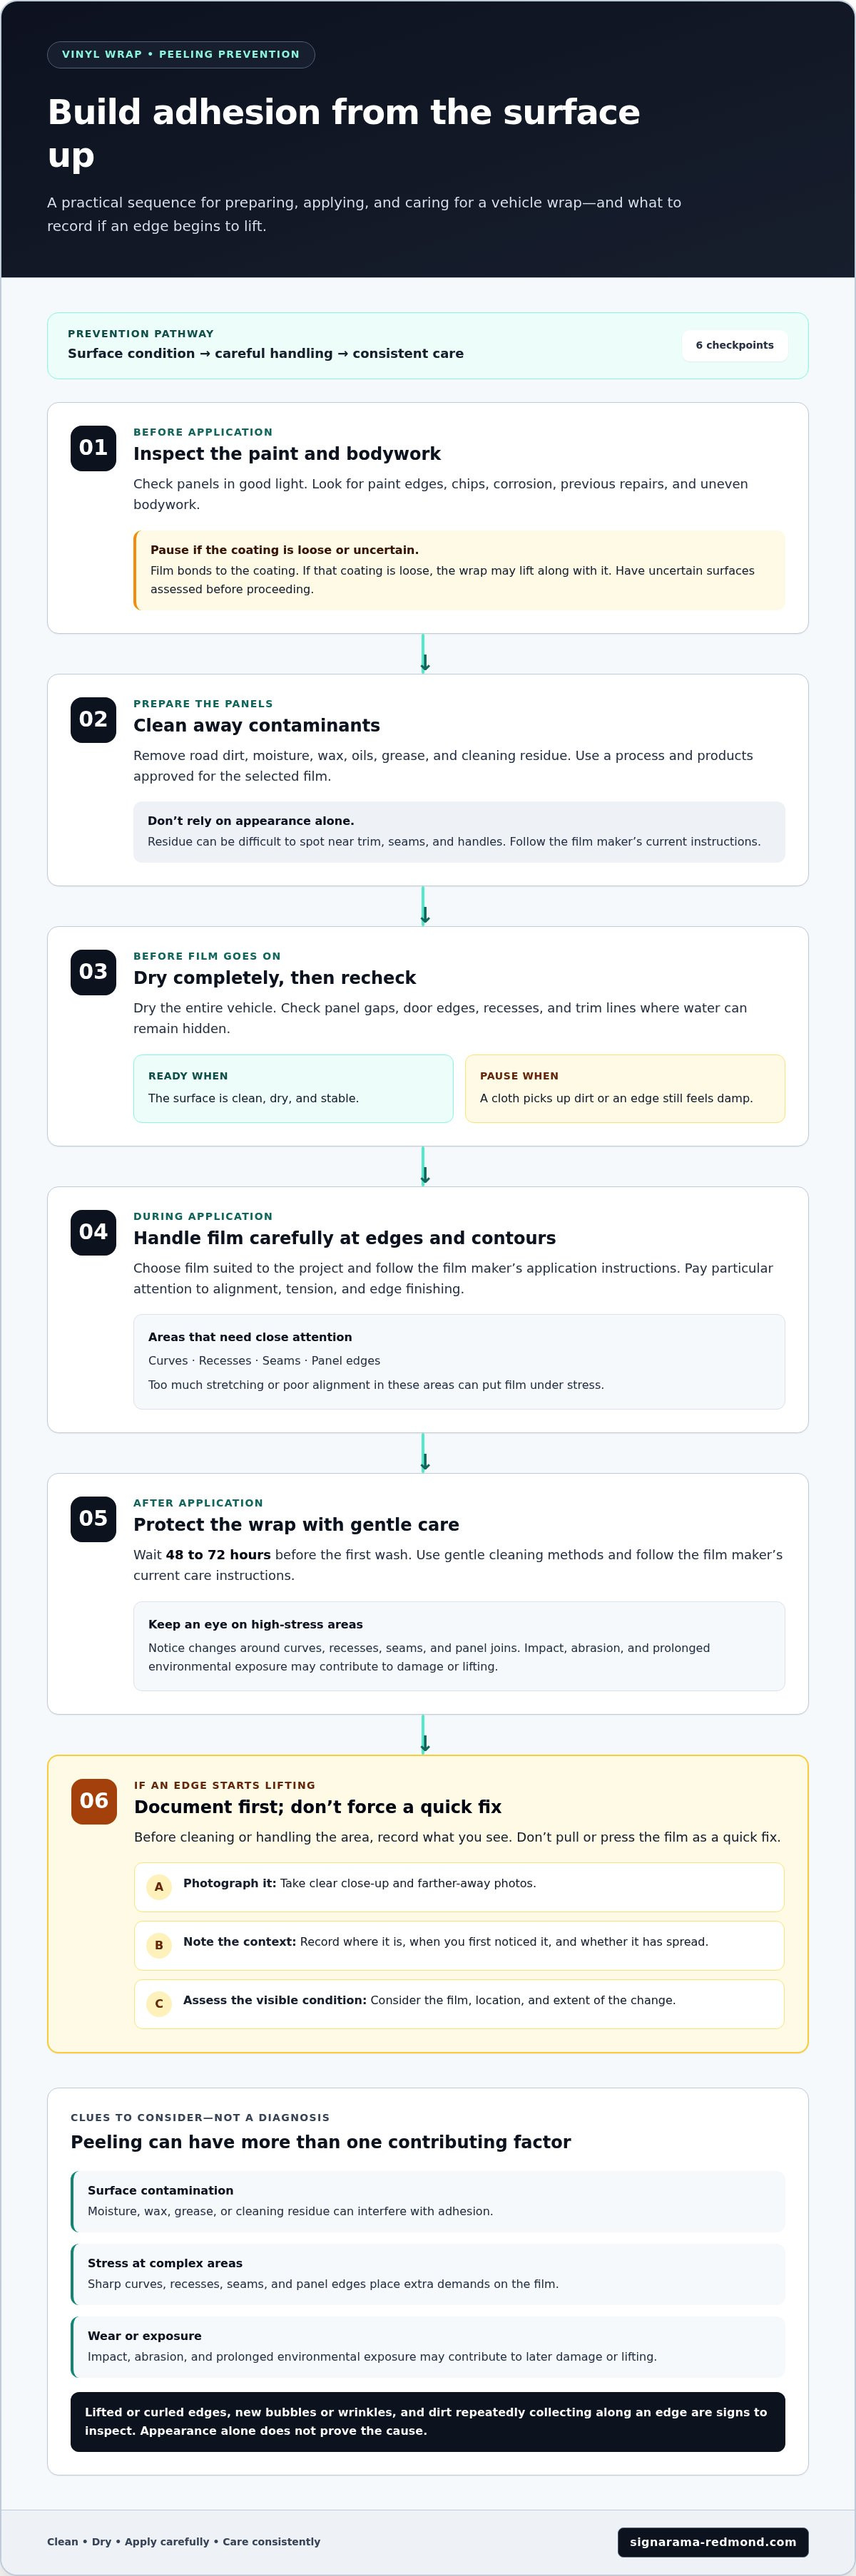
Good surface preparation gives vehicle graphics a better foundation. Work in order: inspect the paint and bodywork, clean the panels, remove residue, let every area dry, and check the surface again. Skipping a step can leave dirt, oil, wax, or moisture between the vehicle and film. These contaminants may interfere with adhesion, especially around edges and recessed areas.
A clean, dry, sound surface gives vinyl wrap the best chance to adhere consistently. Preparation won’t correct damaged paint or unsuitable conditions, but it can help prevent avoidable problems before application begins.
Which surface conditions should be addressed first?
Inspect each panel in good light, paying close attention to paint edges, chips, corrosion, previous repairs, and uneven bodywork. Peeling or flaking paint is a concern because the film bonds to the coating, not directly to a stable factory finish. If that coating is loose, the wrap may lift along with it. A repair that looks smooth from a distance may still have raised edges or an uneven transition that affects how the film sits.
Address defects before wrapping rather than treating film as a way to hide them. A wrap follows the shape of the surface, so dents, rough patches, and paint damage may remain visible or complicate application. If you’re unsure whether a coating is firmly bonded, have the surface assessed before proceeding. A stable substrate helps set realistic expectations for the finished graphics.
How should the vehicle be cleaned and checked?
Clean the vehicle thoroughly to remove road dirt and other surface contaminants, then remove wax, oils, and cleaning residue using a process and products approved for the selected film. Cleaning methods can differ by material, so follow the film maker’s current instructions. Don’t assume a panel is ready just because it looks clean; residue can be difficult to spot, especially near trim, seams, and handles.
Dry the entire vehicle before application. Check panel gaps, door edges, recesses, and trim lines where water can collect or remain hidden. Then recheck the panels by sight and touch for grit, residue, or surface damage. If a cloth picks up dirt or an edge still feels damp, pause and address it before applying film.
Inspect: Note loose paint, corrosion, chips, repairs, and uneven areas.
Clean: Remove dirt and contaminants using film-maker-approved guidance.
Dry: Pay particular attention to gaps, edges, and recesses.
Recheck: Confirm the surface is clean, dry, and stable before application.
This sequence makes preparation repeatable and helps prevent vinyl wrap from peeling before installation starts. Careful planning also supports a more dependable finished result. For vehicle graphics, thoughtful graphics planning starts with considering the surface the design will cover.
Apply Vinyl Wrap Carefully to Reduce Edge Lifting
Once the vehicle surface is ready, careful application helps turn good preparation into a well-finished result. Film handling, tension, alignment, and edge finishing all matter. Follow the selected film maker’s instructions rather than relying on one technique for every material or vehicle. To help prevent vinyl wrap from peeling, position the film with control instead of forcing it to conform through excessive stretching.
A panel may look simple until the film reaches a mirror housing, deep recess, or sharply changing contour. These areas call for planning. The installer needs to position the material so it follows the vehicle’s shape without placing unnecessary stress on the film or leaving vulnerable edges poorly finished.
Why do curves, seams, and edges need extra attention?
Curves and recesses change the direction in which film must lie, while seams and panel edges create natural stopping points. These transitions can make alignment and contact more challenging. If film is pulled too hard to reach a tight contour, tension may encourage it to move back toward its original shape. An unfinished or exposed edge may also face more contact from routine handling and environmental wear.
Not every curve or seam will lift. These details simply deserve deliberate handling and a close final check. Don’t judge an installation only by its broad, flat panels; inspect the transitions where film changes direction or ends.
What should a professional installation process account for?
A complete process connects surface preparation with controlled application and a careful inspection. The installer should follow the film’s handling and finishing guidance, keep alignment consistent, and check edges and complex shapes before considering the job complete. Post-heating may be part of the process for some films or application areas, but it’s a film-specific step. Follow the manufacturer’s current instructions for whether and how to use it.
Quality checks can catch visible issues during the final review. Look for edges that sit unevenly, wrinkles, bubbles, or areas where film appears under strain. These observations don’t automatically identify a cause, but they can signal that an area needs attention before the vehicle returns to regular use.
Plan: Identify curves, recesses, seams, and panel edges before applying film.
Position: Prioritize accurate alignment over pulling film forcefully into place.
Finish: Treat edges and transitions according to the film maker’s instructions.
Inspect: Review complex areas and finished edges as part of the overall graphics project.
Good installation planning matters in graphics work, whether a project involves vehicle graphics or other sign applications. The same attention to preparation, placement, and final review is reflected in professional sign installation in Redmond.
Protect Vinyl Wrap with Consistent Cleaning and Inspection
Good aftercare helps reduce avoidable wear and gives you a chance to spot changes early. Keep the routine simple: wash gently, avoid abrasive treatment, and inspect exposed edges as you clean. Follow the film maker’s current washing and care instructions, since guidance can differ by film and installation. After a new installation, wait 48 to 72 hours before washing so the adhesive has time to bond.
How should a wrapped vehicle be washed?
Hand washing is a careful option for many wrapped vehicles. Use a mild, non-abrasive automotive soap and a soft cloth or sponge. Work gently rather than scrubbing at the film. Avoid abrasive tools and brush-style automated washes, which can be rough on the surface and edges. Rinse and dry without dragging a cloth across a lifted edge.
Pressure-washer guidance depends on the film. Check the manufacturer’s current instructions for whether pressure washing is suitable and how to do it safely. Don’t direct force at seams or edges, where repeated pressure may catch the film or worsen existing lifting. Remove dirt, bird droppings, or sap promptly using a method approved for that film, rather than scraping or using a harsh cleaner.
Small habits matter. Avoid leaning equipment against wrapped panels, brushing snow or debris forcefully across an edge, or using a sharp tool to remove a stubborn spot. When practical, parking under cover can limit prolonged exposure to sun and environmental contaminants.
How can regular checks catch peeling early?
Use routine vehicle cleaning as a reminder to inspect seams, recesses, panel edges, and places that receive frequent contact, such as around door handles. Look for film that no longer lies flat, new bubbles, or dirt collecting repeatedly beneath an edge. Good lighting makes subtle changes easier to notice.
If you find new lifting, take clear photos and note where and when it appeared. Compare the area during later checks to see whether the change is spreading. Don’t pull, cut, or repeatedly press the film back down. Those actions can stretch or damage the material and make the area harder to assess. Minimize contact and follow the film maker’s care guidance while you decide on the next step.
Wash gently: Use non-abrasive methods and film-appropriate products.
Protect edges: Avoid forceful scrubbing, scraping, and direct pressure on seams.
Inspect routinely: Check vulnerable areas as part of normal vehicle cleaning.
Record changes: Photograph new lifting instead of trying to hide or flatten it.
Consistent care is one practical part of preventing vinyl wrap from peeling and keeping vehicle graphics looking considered. For broader context on vehicle wraps in Redmond, explore how vehicle graphics can support a clear, cohesive presence on the road. If you’re planning vehicle graphics, talk with our team about your graphics project.
What to Do if Your Vinyl Wrap Starts Peeling
A lifted edge can be concerning, but don’t rush to press it back into place. Start by documenting what you see, limit contact with the area, and arrange an appropriate assessment. A photo and a note of when the lifting first appeared can help distinguish a small, stable change from damage that is spreading.
Whether a repair is suitable depends on the film’s condition, where the lift is located, what surface is beneath it, and how much of the wrap is affected. A small edge lift on one panel may call for a different response than film that is cracked, creased, contaminated, or separating across a larger area. Appearance alone can’t confirm the cause or the right remedy.
Can a lifted vinyl-wrap edge be fixed at home?
Pressing an edge down may make it look flatter temporarily, but it won’t necessarily restore reliable adhesion or address contamination beneath the film. Repeatedly pushing or rubbing the area can also stretch or damage it. Avoid applying unapproved adhesives, using heat, or cutting the film with a sharp tool. These actions can change the material or underlying surface and complicate an assessment.
Arrange an assessment if the lifted area grows, returns after being pressed, or exposes the surface underneath. Take photos before trying to intervene, and keep the vehicle-care or film instructions available if you have them. This information helps describe what happened without assuming the cause.
What details help assess peeling?
Record the affected panel, whether the lift follows an edge or appears within the film, and whether you’ve noticed bubbles, wrinkles, cracking, or a change in the exposed surface. Note when the symptom began and any relevant event, such as a wash or impact, without treating timing as proof. These details provide useful context for considering the film, location, substrate, and extent of lifting.
For a future wrap, think of prevention as a connected plan, not one isolated step. Begin with a sound, properly prepared surface; use careful application that follows the film maker’s guidance; and follow film-specific washing and care instructions. Keep the film information, installation date, and care guidance together. If an issue appears later, those notes can help make sense of the timing and symptoms.
Document: Photograph the lift and note when and where it appeared.
Minimize contact: Don’t pull, cut, heat, or repeatedly press the film.
Assess: Consider the film’s condition, location, underlying surface, and spread.
Plan ahead: Keep installation and aftercare details for future reference.
Understanding how to prevent vinyl wrap from peeling means considering the graphics’ full life, from preparation through routine care. Explore vehicle-wrap guidance from Signarama Redmond for more information about vehicle graphics.
Make Your Next Step a Clear One
Turn what you’ve learned about how to prevent vinyl wrap from peeling into a practical plan for your vehicle. Keep the film maker’s care instructions with your vehicle records, and note any changes you spot over time. If an edge starts lifting, a calm, documented assessment is more useful than a quick fix that could make the condition harder to understand.
Explore vehicle-wrap guidance from Signarama Redmond and take the next step with a clear plan for your graphics project. Attentive care can help you protect the finished look of your vehicle graphics.
Frequently Asked Questions
Why does vinyl wrap start peeling at the edges?
Vinyl wrap often begins lifting where film meets an exposed edge, seam, or tight contour. Contamination or moisture can interfere with adhesion, while excessive tension may encourage film to pull back from a curve. Later contact, abrasion, or weather exposure can also contribute. Location and timing offer clues, but an edge lifting by itself doesn’t prove what caused the problem or who is responsible.
Can I prevent vinyl wrap from peeling after installation?
You can reduce avoidable wear after installation, though no care routine can rule out every cause of lifting. Follow the film maker’s care instructions, use gentle cleaning methods, and avoid brushing or scraping across edges. Inspect high-contact spots, such as door edges and around handles, during routine cleaning. If you’re learning how to prevent vinyl wrap from peeling, consistent care and early attention to changes are useful habits.
Is it normal for a new vinyl wrap to peel?
Peeling shouldn’t be dismissed as a normal part of having a new wrap. If you notice lifting soon after installation, photograph it and record where it appears rather than pressing it down. Check the care instructions before washing: newly installed film may need time to bond, and the waiting period can depend on the manufacturer’s guidance. A documented, early assessment can help clarify whether the area needs attention.
How should I wash a car with a vinyl wrap?
Wait 48 to 72 hours after installation before washing, unless the film maker’s current instructions specify otherwise. Use a mild, non-abrasive, pH-neutral automotive soap and wash gently by hand. Avoid brush-style automatic washes and don’t aim strong water pressure at edges. For a pressure washer, follow film-specific directions; verified general guidance is below 2,000 psi, below 180°F, with a 40-degree nozzle at least one foot away.
Can I use a heat gun to stop vinyl wrap from peeling?
Don’t use a heat gun as a home fix for a lifting edge. Heat may be used in some film-specific installation processes, but that doesn’t mean it will restore adhesion after peeling begins. Uncontrolled heat can distort or damage the film and may affect the surface beneath it. Leave any heat-based work to a process guided by the film maker’s current instructions and the condition of the wrap.
What should I do if my vehicle wrap starts peeling?
Photograph the area, note when you first saw it, and limit contact while you arrange an assessment. Include a wider photo showing the panel and a close view of the lift. Avoid adding glue, cutting the film, or repeatedly pushing the edge down, since these steps may alter the damage. If the lifting spreads, returns, or exposes the underlying surface, prompt assessment can help determine suitable next steps.
Does peeling paint cause a vinyl wrap to peel?
It can. Vinyl adheres to the surface beneath it, so if that paint is flaking or poorly bonded, the film may lift along with the coating. A chip with stable surrounding paint differs from a broad area of loose paint, but appearance alone may not establish how secure the coating is. Have questionable paint assessed before wrapping, rather than relying on film to conceal a surface problem.

Signarama Redmond, WA
Summer Hours (July - August) - MON-THUR: 8.00AM - 6.30PM, FRI - SUN: CLOSED
contact
Signarama Redmond, WA