
Vehicle Wraps for Business: What to Expect from Start to Finish
May 6, 2026 by Sam Brown
If you’ve ever seen a branded van rolling down I-25 and thought, “I need that for my business,” you’re not alone. Vehicle wraps are one of the most cost-effective forms of advertising available to small and mid-sized businesses — turning everyday work trucks, vans, and company cars into moving billboards that generate thousands of impressions every single day.
But if you’ve never gone through the process before, it can feel a little mysterious. How does it actually work? How long does it take? What do you need to prepare? This guide walks you through the entire vehicle wrap process — from your first conversation with our team all the way to hitting the road with a fully branded vehicle. And we’ll use a real job we recently completed for Stone Ridge Construction right here in Colorado Springs to show you exactly what it looks like in practice.
Step 1: The Consultation — Defining Your Goals
Every great vehicle wrap starts with a conversation. Before any design work begins, we want to understand your business, your brand, and what you’re trying to accomplish.
Key questions you should be ready to answer:
- What type of vehicle(s) are you wrapping?
- Do you have existing brand guidelines, logos, or color palettes?
- Are you looking for a full wrap, partial wrap, or simple vinyl lettering?
- What’s your timeline and budget?
This is also your opportunity to ask questions. We’ll walk you through material options, finish types (gloss, matte, satin), and give you realistic expectations around cost and turnaround.
Pro tip: Bring high-resolution versions of your logo and any brand assets to your first meeting. Low-resolution files are one of the most common causes of design delays.
For Stone Ridge Construction, they came in with a clean, established brand — a sophisticated wordmark with strong typography that was well-suited for a large vehicle surface. That made the design process smooth and efficient.
Step 2: Vehicle Measurement and Templates
Once you’ve decided to move forward, we’ll either photograph and measure your vehicle in person or pull a manufacturer template for your exact make, model, and year. Accurate templates are critical — a design that looks great on screen can go sideways fast if it doesn’t account for door handles, mirrors, bumpers, and body contours.
Stone Ridge brought in a Mercedes-Benz Sprinter van — one of the most popular vehicles for commercial wraps because of its large, flat panel surfaces and strong brand presence on the road. We pulled the exact template for their Sprinter and built the design layout to work with the vehicle’s proportions from the start.
Step 3: Design
This is where your vision comes to life. Our design team takes your brand assets and builds a layout that works with the shape of your vehicle — not against it. Good vehicle wrap design accounts for:
- Viewing distance and speed — messaging needs to be readable in 3 seconds or less
- Panel breaks — doors, windows, and body lines that interrupt the design
- Color contrast — your brand colors need to pop against street-level backgrounds
- Call to action — phone number, website, and service area should be prominent
For Stone Ridge, the design leaned into their premium brand positioning — clean, minimal, and confident. The kind of wrap that makes a construction company look like the one you want handling your project.
We’ll always present you with a design proof for approval before anything goes to print. This is your chance to request revisions. Be thorough — changes are easy at this stage and costly after printing.
Step 4: Print and Lamination
Once you’ve approved the design, it goes to production. We print commercial-grade vehicle wraps on cast vinyl using large-format printers capable of producing vivid, high-resolution graphics. Cast vinyl is the gold standard for vehicle applications because it conforms to curves and complex surfaces without distorting or lifting.
After printing, the vinyl goes through our laminator, which applies a clear protective overlaminate. This layer protects the print from UV fading, abrasion, fuel spills, and Colorado’s intense sun and weather — and it’s what gives the wrap its long-term durability. A quality wrap, properly maintained, can last 5 to 7 years.
Turnaround time for print and lamination: Typically 1–3 business days once the design is approved, though this varies by wrap complexity and shop workload.
Step 5: Vehicle Prep
Before installation begins, the vehicle is thoroughly cleaned. Any dirt, wax, grease, or residue left on the surface can cause the vinyl to lift, bubble, or fail to adhere properly. Our installers wash and degrease the entire vehicle, and wipe down panel edges and recesses with isopropyl alcohol.
This step matters more than most business owners realize. A clean surface is the foundation of a wrap that lasts. If you’re dropping a vehicle off for installation, avoid applying any new wax or detailing products in the days beforehand.
Step 6: Installation
Vehicle wrap installation is a skilled trade. It takes experience, patience, and the right tools — heat guns, squeegees, and precision knives — to apply vinyl smoothly across complex body panels without wrinkles, bubbles, or misalignment.
The process involves:
- Positioning large panels of vinyl on the vehicle
- Applying heat to activate the adhesive and allow the vinyl to conform to curves
- Squeegeeing out air and smoothing edges
- Trimming excess vinyl around door edges, handles, and openings
- Post-heating recessed areas to ensure long-term adhesion
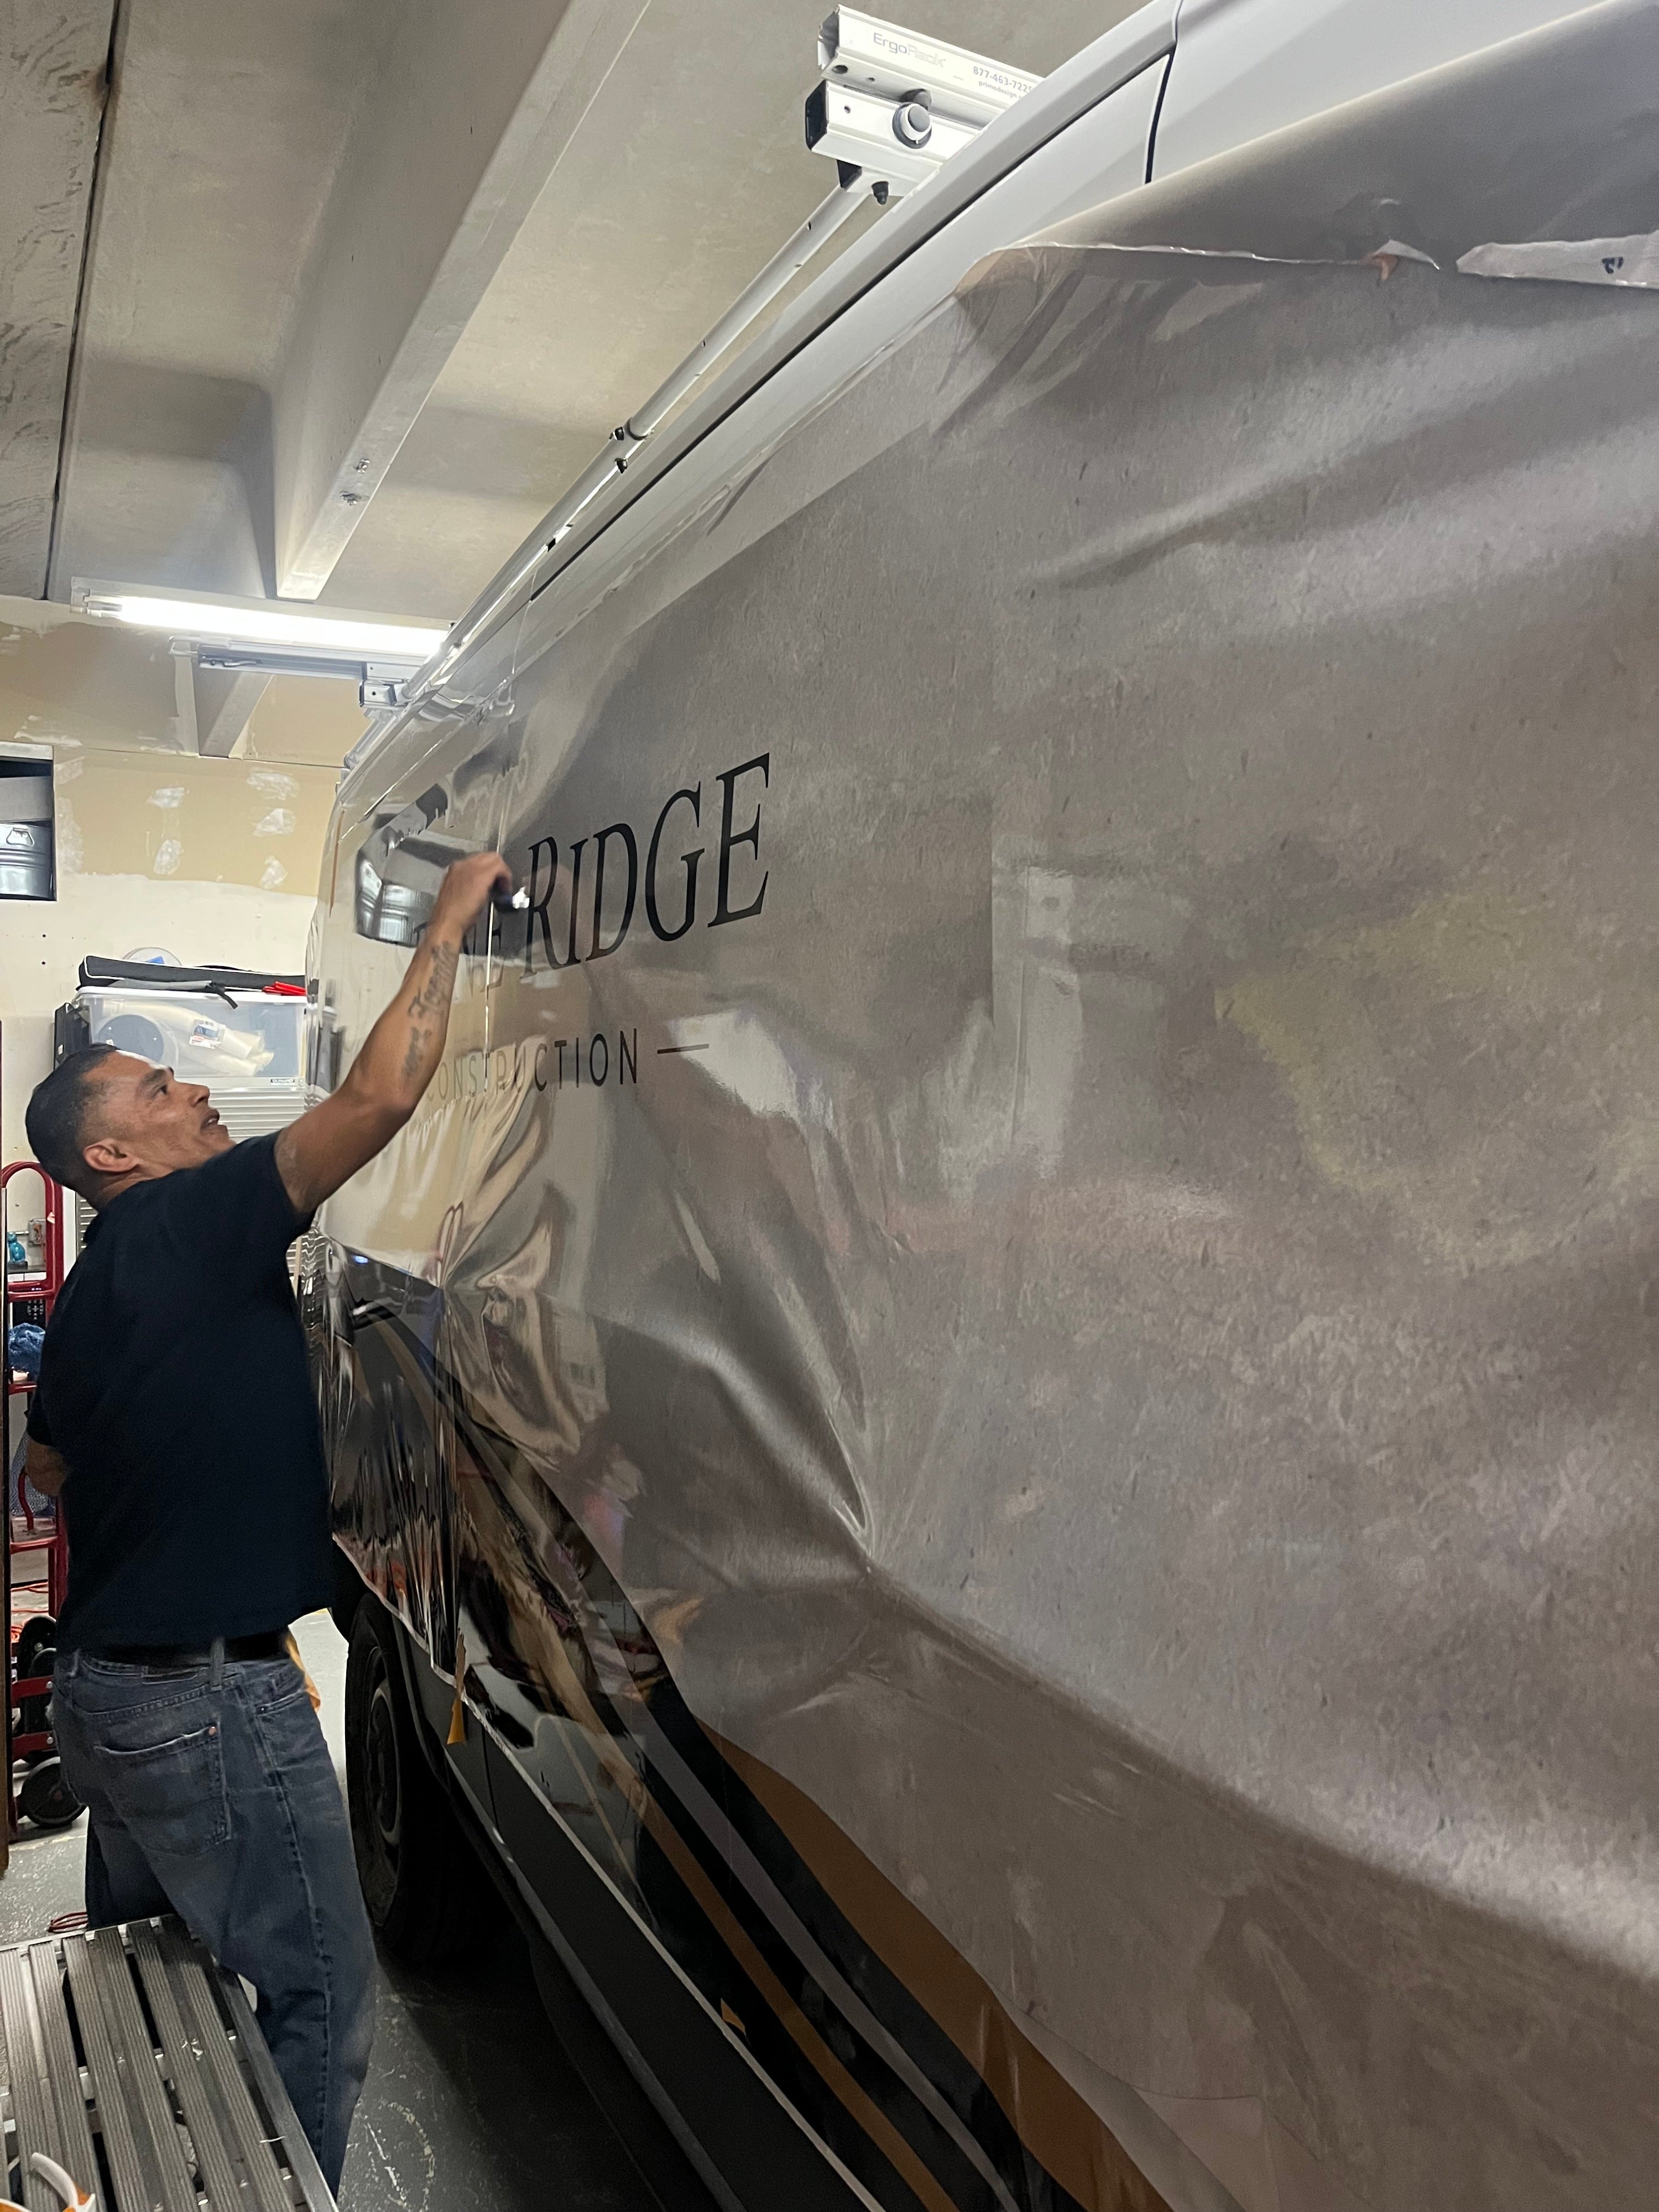
Photo: Our installer laying a panel on Stone Ridge Construction’s Sprinter van — carefully positioning the vinyl before smoothing and heat-setting it into place.
The photo above captures exactly what this stage looks like in our shop. Our installer is positioning a large panel on the side of Stone Ridge’s Sprinter, working from the top edge down to maintain alignment across the full length of the vehicle. What looks like a wrinkled sheet of material at this stage will be worked out completely as the panel is squeegeed smooth and heat is applied to conform the vinyl to the body contours.
Installation time varies by vehicle size and wrap complexity. A Sprinter van with a full wrap like Stone Ridge’s typically takes 1–2 full days. A partial wrap or vinyl lettering on a passenger car can often be completed in a few hours.
Step 7: Final Inspection and Pickup
Before you drive away, we walk through the finished wrap together and inspect every panel, edge, and seam. This is your final opportunity to flag anything that doesn’t look right — though with experienced installers, surprises at this stage are rare.
You’ll also leave with care instructions, which typically include:
- Wait 24–48 hours before washing the vehicle
- Hand wash only for the first few weeks, or use touchless car washes
- Avoid pressure washing directly at seams and edges
- Park in the shade when possible, to extend the life of the wrap — especially important along the Front Range where UV exposure is high
Ready to Wrap Your Vehicle in Colorado Springs?
At Signarama Colorado Springs South, we handle every step of the vehicle wrap process in-house — from design and print to professional installation. We work with contractors, trades businesses, service companies, and fleets of all sizes across the Pikes Peak region.
If Stone Ridge Construction’s Sprinter wrap is the kind of quality you’re looking for, we’d love to talk about what we can do for your vehicles.
Contact us today to schedule a free consultation.


Signarama Colorado Springs South, CO
Or by Appointment
contact
Signarama Colorado Springs South, CO